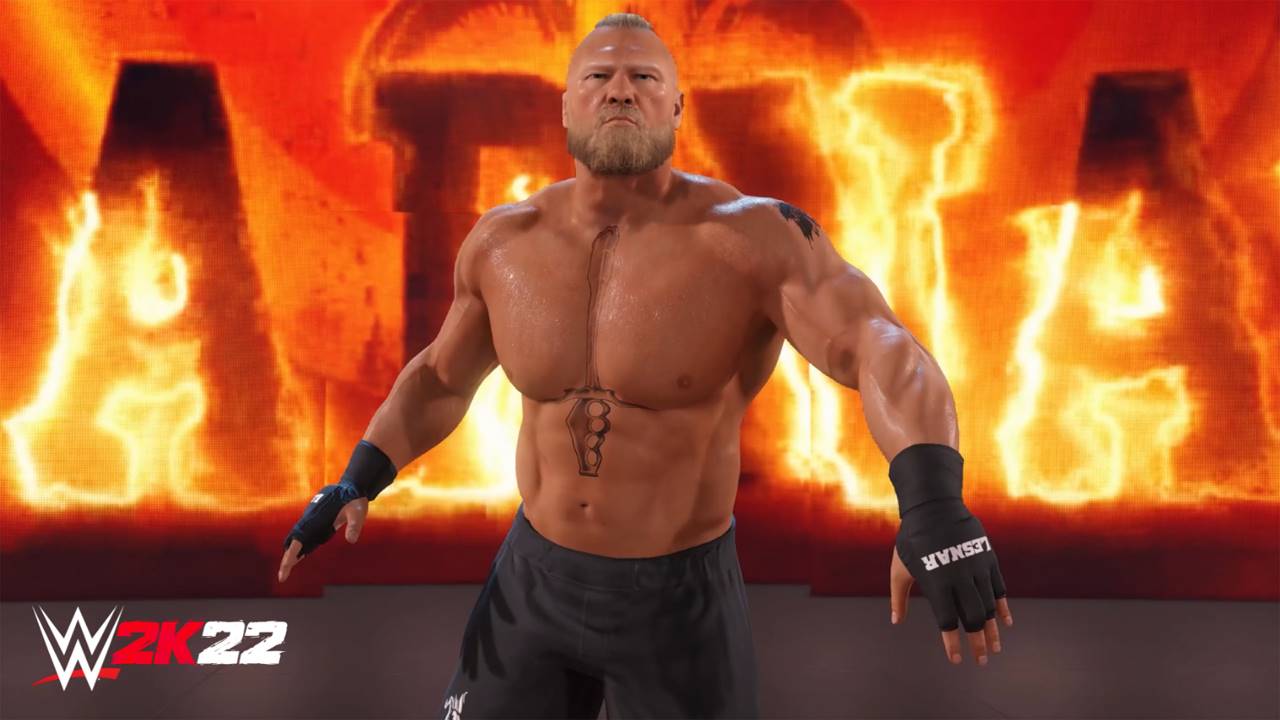
WWE 2K22 gives you the liberty to create a superstar and customize literally everything about him. Ranging from the appearance to movie sets, to victory animations, entrances, and a lot more.
However, if you are very new to the game you get to find yourself a little lost in the huge creation mode. This is where we come into the picture. I will be helping you with a step-by-step guide on how you can create a superstar on your own.
WWE 2K22 – How to Create a Superstar Guide | Tutorial for Beginners
It’s been a pretty long wait. Over a year to be precise. WWE 2K22 has been the most anticipated wrestling game and it’s finally here on all platforms. There are quite a few game modes to enjoy. With the return of MyGM mode, things look more interesting than ever.
However, there is one mode that always kept me engaged more than any other. It brings that breath of freshness every time I feel bored playing the same type of matches over and over again. The Creation Mode is what I am talking about here.
I remember spending countless hours creating wrestlers of all types in the previous installments and then making unique entrances for each one of them.
Where to find “Create a Superstar” ? (CAW) :
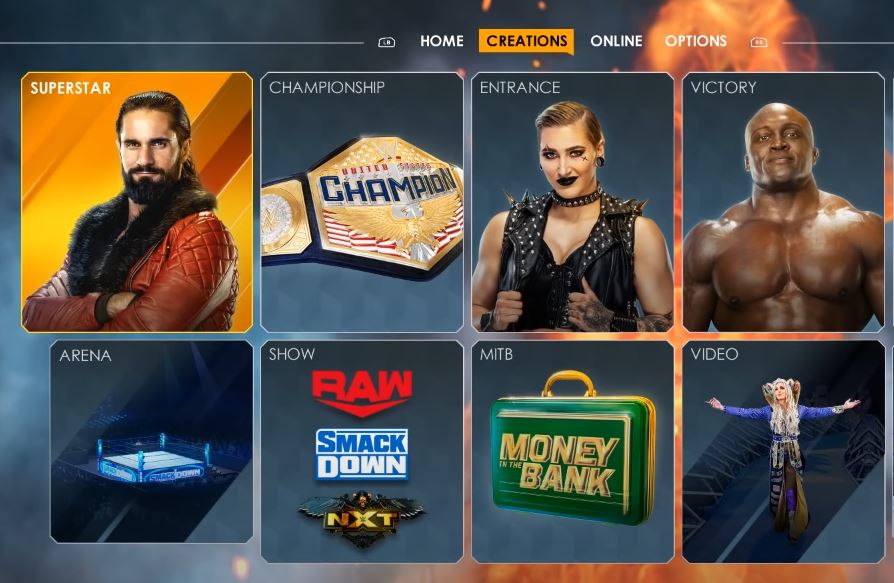
First and foremost you need to go to Creations. Now select the option Superstar (the very first one). Now you have to select the gender – Male or Female.
Select a Class :
Every wrestler is categorized into class and weight categories. For weight categories you can select between :
- Cruiserweight
- Light Heavyweight
- Heavyweight
- Super Heavyweight
For Classes you have :
- Striker: Good with striking attacks.
- Technician: Great with technical abilities like reversal for example
- Powerhouse: Strong grapple moves to inflict more damage
- High Flyer: The one who does all the aerial flashy moves. Jumps off the top turnbuckle.
You can literally select any weight category and pair it with any fighting class. For example, you can easily select the Super Heavyweight category and then make him a High Flyer. It’s pretty crazy for a Super Heavyweight to be a High Flyer. Imagine the Big Show doing the 360 back flip off the top turnbuckle. It’s fun at the end of the day.
Select a Persona :
After you have selected the weight and class for your superstar you need to select a persona for him. Which is basically choosing from a list of outfits that the game offers you. Every wrestler has a gimmick. Their appearance is kind of based on the gimmick. Take for example the Undertaker follows a gimmick where he captures souls and buries people alive and all the spooky stuff. We do not expect him to dress like a clown or a manager. You have this list of personas in WWE 2K22 from which you can choose:
- Current Persona
- No Persona
- Wrestling
- Streetwear
- Battlewear
- Cosplay
- Formalwear
- Future
- Past
- Sports
- Entertainer
- Occupations
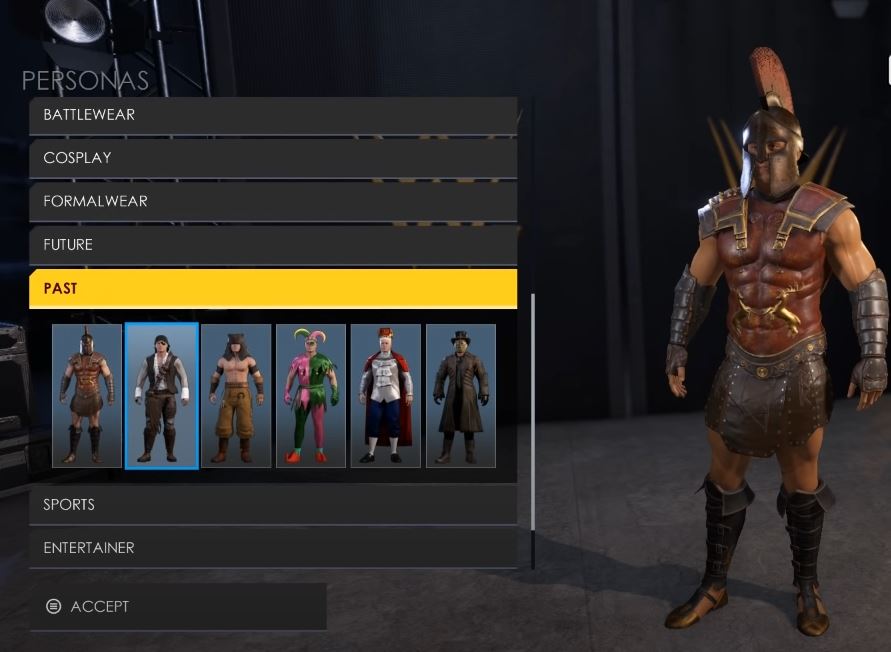
Each of these categories has several attires from which you can choose one and then select Accept.
Superstar Name Information :
After you have selected the persona you would have to fill in the name and other information about your superstar :
- Name
- Abbreviated Name
- Entrance Name
- Social Account Name
- Presentation Name
Select Accept and we proceed further.
Superstar Appearance :
It is time to customize the Face, Body, Personal Information, Attire, etc within this section.
Face :
Select the face option to edit the facial features of your superstar. This is further categorized into :
- Face Template
- Facial Parts
- Face Deformation
- Face Photo Capture
You can select a facial template from the huge list of face samples that you get. After that, you can easily customize each facial part individually to make your superstar look unique. The Face Photo Capture however is a very unique feature that allows you to upload your own photo and then place it on the superstar’s face. In this way, you can make your superstar look exactly like you.
Body :
You can edit your superstar’s body over here. Further categorized into :
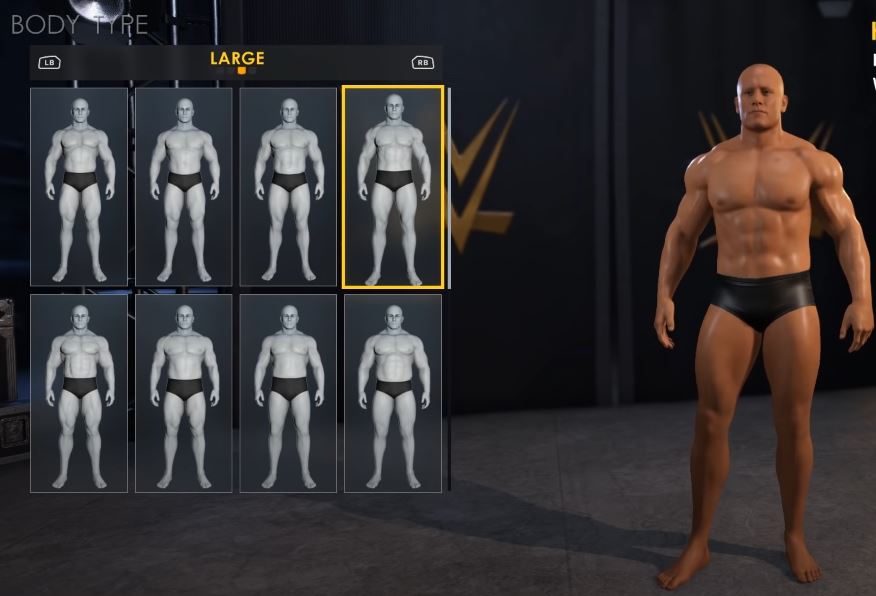
- Body Type
- Skin Color
- Veins
You have various kinds of Body Types for your superstar like Thin, Medium, Large and Heavy. Choose whichever type you want. You can select the skin tone for your superstar and also the number of veins the wrestler would show on their body. I always preferred the veiny look on a wrestler. For some reason it made them look pretty strong.
Attire :
The attire you selected from the persona is not the final one. You get a chance to edit that attire as well. Within Attire you get these options :
- Attire Type
- Appearance
- Clothing
- Parts Color
- Import Parts
- Select Persona
Appearance would actually let you select the Hairstyle for your superstar. You can edit his Eyes and Facial hair as well. There is a huge list of hairstyles you can choose from. You can also go for Makeup, Face Paint or Face Tattoos as well over here.
Within Appearance, you would also have the option of Upper and Lower Body. Over hair, you can select the amount of Body Hair you want on your superstar. You can add Tattoos on his body or maybe some Scars to make him look tougher.
When you select Clothing you get to choose Head Gear for your superstar. Maybe Hooded Clothing, High Collar Clothing, or a Headwear. You can choose a good Mask for your superstar as well. Don’t forget the Piercings though, you can add them too.
Lower Body clothing would include Trunks, Wrestling Tights, Bottoms, and Belts. You can add Knee Pads and Socks too. Lastly, we have Boots and Shoes.
Personal Information includes the Name Information of the superstar. The Custom Image for your superstar (the one that appears in the player selection screen), the type of crowd reaction (boo or cheer), the billboards you want the crowd to hold up while you make your entrance, or the Crowd Signs. You can also choose the Hometown and the Menu Screen Pose for your superstar in the Personal Information section.
Performance :
Under the Performance section you can choose these :
- Entrance
- Victory
- Taunt
- Signature
- Finisher
This is just a quick buildup. So do not worry about your entire move-set as you can, later on, create the entire move list for your superstar within the Create a Move Set option under Creations.
There you go, a very simple and quick guide for Creating a Superstar in WWE 2K22. I hope this guide was helpful. Do let us know in the comments section down below. Also, keep an eye on FPS Index for more guides and content related to WWE 2K22.
Arya is an avid gamer and a full-time content writer. His love for games is so unconditional that despite having a degree in Mass Communication he chose to have a career in the blogging world. He is a FIFA lover and has played every single FIFA game released since 2005. His knowledge of Sports Games is impeccable and every single article he writes is backed by years of experience.
Hey how do i do HACK MOVE SET
How get download Chris Danger in my Rise